Table of Contents
ToggleMethod 1 Using Shortcuts
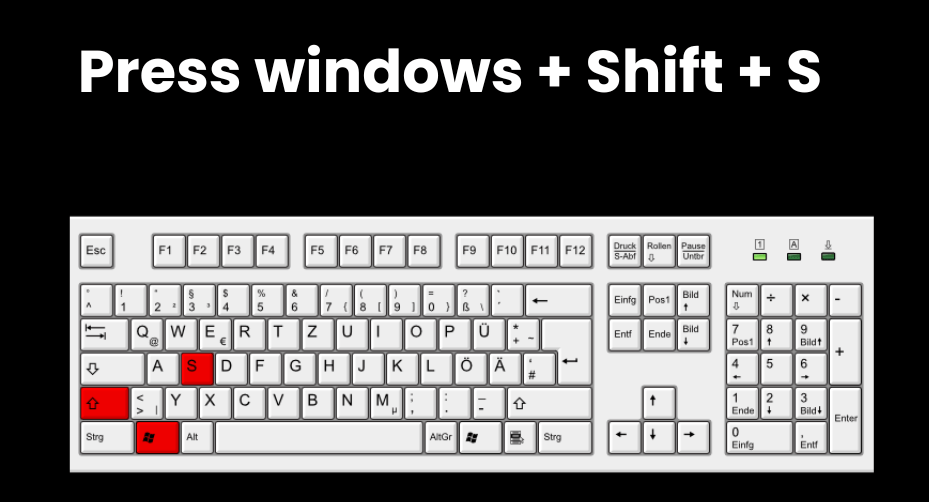
You can take screenshots in your windows computer through the snipping tool by using keyboard shortcuts by pressing Ctrl + Shift + S buttons.
Step 1: Open Snipping Tool

Press Ctrl + Shift + S buttons at the same time. In this Press the Windows Button, Shift button and S button on your PC.
Now the snipping tool is opened.
Step 2: Capture the Screenshot:
Now your screen will fade slightly, and the cursor will change to a crosshair. Click and drag to select the area you want to capture. Release the mouse button when you’ve highlighted the desired area.

Now, the screenshot will be copied to your computer’s clipboard.
Step 3: Paste the Screenshot
Now you want to open Microsoft word or paint to paste this file. You can use Ctrl + V for paste the screenshot file.

Step 4: Save Your Screenshot

After pasting your screenshot in Microsoft word or paint, click on “File” in the word or paint and choose “Save As.” Select the location where you want to save the screenshot, provide a name, and choose your preferred file format (usually JPEG or PNG). Click “Save” to save the screenshot.

Method 2: Open the Snipping Tool from Computer
Step 1:
Press the Windows key, type “Snipping Tool,” and press Enter to open it.

Now the snipping tool will be opened.
Step 2:
Click on the “New” button to initiate the screenshot process. Alternatively, you can Select the snip type from the Mode option using drop down button.

Step 3:
Capture the screenshot. Now the screen will fade slightly, and the cursor will change to a crosshair. Click and drag to select the area you want to capture.

Step 4:
Now, a new box will open. Click on the “file” option and save your screenshot in your preferred location.

Also read: Keyboard shortcut hacks

